Project 2:
Project Specification: Continue building the Budget App. Add at least two entries for each transaction, create a home page for the Budget App to display a title and brief description, and two pages that display data: a page that lists all transactions (credits and debits) and a page that shows all the entries for a particular transaction.
- Make a copy of your Project1-Django folder and name the folder Project2-Django.
- Navigate to the directory that contains manage.py and open the folder in VS code.
-
(25 points) Start by creating at least two entries for each transaction:
- a. To do so, first define a second model,
Entry, with five fields (attributes) in the models.py file:transaction,merchant,description,transaction_amountanddate_added.- i. The
transactionattribute should have a ForeignKey datatype. Pass in the two arguments: Transaction and on_delete=models.CASCADE. - ii. The
merchantattribute should have a CharField datatype. Give it a max_length of 200 characters. - iii. The
descriptionattribute should have a TextField datatype. - iv. The
transaction_amountattribute should have a FloatField datatype. Give it a max_length of 10 characters. - v. The
date_addedattribute should have a DateTimeField datatype. Pass in the argument, auto_now_add=True
- i. The
- b. Nest the Meta class inside the
Entryclass so that multiple entries will appear correctly - c. Define another str(self): function to show the merchant information.
- d. Once logged into the admin site (http://localhost:8000/admin) create two entries for each transaction type.
- a. To do so, first define a second model,
-
(25 points) Create the Budget App Home Page:
- a. Map the URL:
- i. Modify the urls.py file (budget_log/urls.py) by mapping the base URL to the Budget Apps’ home page. Remember to make a second urls.py file in the budget_app folder.
- b. Write the view:
- i. Navigate to the views.py file to write a function called
index(). The request object should be passed to this view function and the only code in the function is a call to render(). The render() function will have two arguments – the original request object and a template it can use to build the page.
- i. Navigate to the views.py file to write a function called
- c. Write a template:
- i. Follow the “How to Write a Template” steps on the “Writing a Template” course notebook page to set up the correct project folder structure. Simply substitute the code_journals folder name with budget_app.
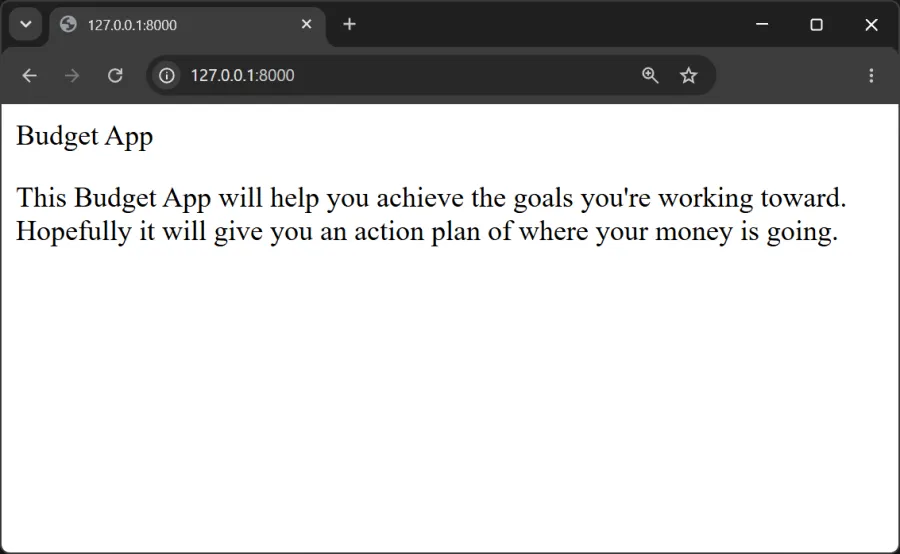
- ii. Create the html file called, index.html so that when we request the project’s base URL, http://localhost:8000/, we’ll see the resulting page:
- a. Map the URL:
The home page should look like the following when you have completed this portion of the project:
-
(25 points) Build the web page that lists all transaction types (credits and debits):
- a. Create the Parent template, base.html in the same directory as index.html.
- b. For the child template, rewrite index.html to inherit from base.html.
- c. Create the Transactions page
- i. Define the URL for the transactions page
- ii. Modify the views.py file and add/define the
transactions()function. - iii. Make a file called transactions.html in the same directory as index.html to display the transactions in the template.
- iv. Modify base.html to include a link to the transactions.html file to display the transactions.
-
(25 points) Build the web page that shows all the entries for each transaction type:
- a. Start by modifying the urls.py file (budget_app/urls.py) so that the URL pattern for the transaction page can use the transaction’s id attribute to indicate which transaction was requested.
- b. Modify the views.py file so that the
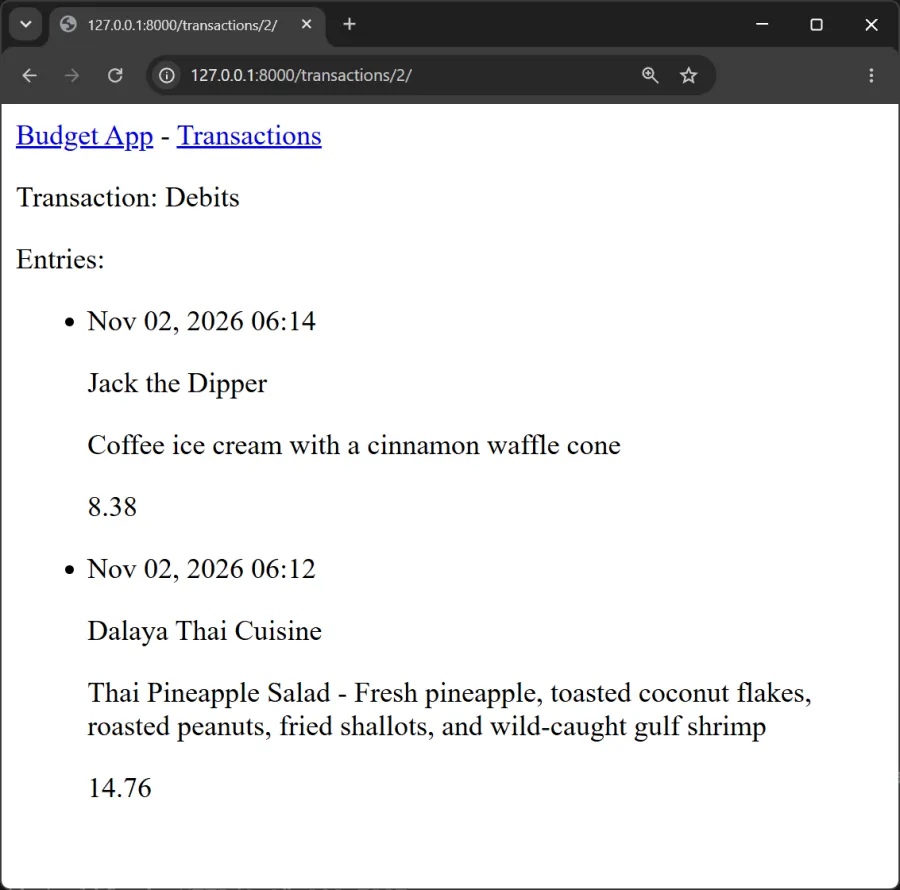
transaction()function can get the transactions and all associated entries from the database - c. Create the Transaction Template, transaction.html to display the name of the transaction and the entries. Save this html file in the same directory as the other html files.
- d. Finally, modify the transactions template (transactions.html) so each transaction type links to the appropriate page.
- Generative artificial intelligence tools (ChatGPT, Claude, Copilot, etc.) are not allowed to be used on projects. The project code should directly reflect and relate to the material covered in our course notebook.
- Submission Instructions: The project will be due on Monday, November 9 by 11:59p. Zip/Compress the project folder and submit to Canvas.
The transaction page displaying the debit entries should look similar to the following (your entry details will likely be different than the ones shown below):